
.png)

 100% Recycled Plastic
 Will Never Rot
 25 Year Guarantee
 Low Carbon Footprint
How To Install Recycled Plastic Cladding
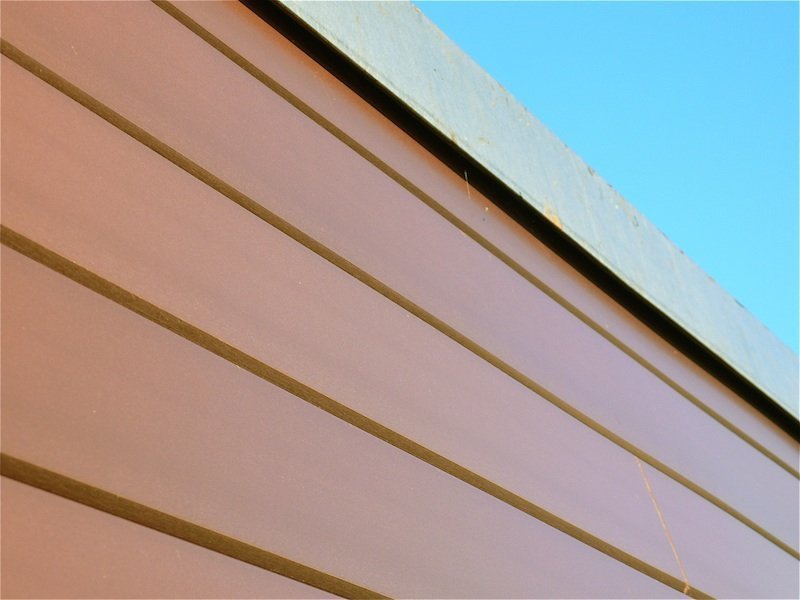
Here at Kedel our wide range of recycled plastic cladding includes V cladding and can be installed over brick to protect, improve the appearance and insulate.
With such an easy installation process, anyone can introduce recycled plastic cladding from Kedel to their property. Today we’ll be showing you just how to do so, with a simple step by step guide and video.
Equipment & materials needed:
-
1 Mitre saw
-
Concrete screws
-
Drill & drill bits (x1 concrete, x1 battens/cladding, x1 screw heads)
-
Standard screws
Step 1 - Measure your working area
- Measure the height and width of the wall you’re working on
Step 2 - Measure and cut battens
-
Measure your battens to the correct height, and cut them to the correct size with a power tool
-
Cut approximately 5-10mm off the end of the battens so you can have a flat edge to them
Step 3 - Pre-drill battens and brickwork
-
Place measured battens up against the wall and pre-drill through the batten. Be careful NOT to drill into the brickwork itself just yet
-
Make sure you pre-drill enough holes so that when you fit batten to the wall it’ll fit safely and securely
-
Space the battens out no more than 500mm apart
-
Repeat until all measured battens have been pre-drilled
-
Changing to the correct drill bit, you can now pre-drill into the brickwork through the battens
Step 4 - Screw battens onto brickwork
-
Screw all battens into the brickwork so that they are tight and secure
-
Repeat until all the battens are safely secured to the wall
Step 5 - Measure and cut cladding
-
Measure the cladding to fit the width of your wall
Step 6 - Pre-drill cladding and screws onto battens
-
Start at the bottom and place cladding against the battens
-
Pre-drill through the tongue of the cladding and into the battens
-
Make sure to move the drill in a circular motion when pre-drilling through the cladding, as this allows expansion. This is known as reaming and it’s important to ream 1mm on either side of the screw hole for every 1m length of cladding
-
Repeat until the whole length of the cladding has been pre-drilled and reamed
-
When putting cladding lengths together, make sure you leave a gap at each end of at least 1mmfor every 1m of cladding. This allows for expansion in hot weather and prevents cladding from buckling
-
Screw cladding onto battens and repeat until all cladding is fitted safely and securely
Step 7 - Pre-drill and screw on corner trim
-
Pre-drill corner trims
-
DO NOT pre-drill into the face of the cladding, instead, go into the side of the corner trim and the batten
-
Make sure you use the correct screws and be careful not to overlap any previous screws drilled into the battens
To see these steps in action, watch our detailed video below.
For inspiration and tips on using cladding, take a look at our recent blog post now. Browse our wide range of recycled plastic cladding today at Kedel, or discover more recycled plastic products such as recycled plastic decking and recycled plastic fencing.